- Is this your first CoderDojo session? Or your second, or third? Stick with us and soon you’ll be a Master. But for now, you might be looking for this page instead: What To Expect
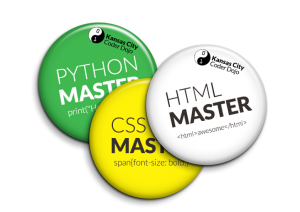
We’re always looking for new ways to reinforce learning and grow our skills in new areas. To foster this, we’ve created mastery badges to show off coding prowess. Anyone can apply for a mastery badge and earn one by completing certain tasks. If you have any questions, email masterybadges@coderdojokc.com.

How to Apply:
- Read the project requirements below.
- Ensure your project meets all the requirements. Badges will have several tasks to complete. You must combine them into one project.
- Submit your project for review at using the button below.
- Ask to meet with a mastery mentor to ensure your project meets requirements.
- If verified, you must present each task at the next CoderDojo session in the morning and explain what you learned and how you completed it.
Once you’ve presented, your new badge will be handed to you on stage! Have your parent’s camera ready, and your next challenge in mind.
1st Place Presentation:
Win 1st place based on mentor grading criteria:
- Three Categories: Project originality, Project Difficulty, Presentation. Graded on a scale of 1–5, rate the project’s originality, difficulty, and presentation.
2nd Place Presentation:
Win 2nd place based on mentor grading criteria:
- Three Categories: Project originality, Project Difficulty, Presentation. Graded on a scale of 1–5, rate the project’s originality, difficulty, and presentation.
Scratch Mastery:
Create and present projects that use a combination of concepts from the “Concept of the Day” used each session.
- Mastery Level 1 : incorporate 3 concepts
- Mastery Level 2 : incorporate 6 concepts
- Mastery Level 3 : incorporate 9 concepts
For Web Mastery badges, you’ll need to set up an environment to write your code in.
- If you don’t have your own computer: Create an account on Code Anywhere, which is an in-browser editor.
- Once you’re signed into your dashboard you can click “create a new workspace” and choose the HTML5 option.
- You can work on your project there, and in your html file click “Preview -> Live Preview” to see your page in the browser.
- Follow this guide when you’re ready to push to GitHub Pages.
- If you DO have your own computer, you can download your own editor. We like VS Code, Sublime Text 2 or Atom.
- It’s best practice to create a folder for your project where you’ll save all your code files to. Make sure to put it somewhere you’ll remember!
- In that folder, you’ll need to create an index.html page to get started. You can read about how to set up your page here.
HTML Mastery:
For HTML mastery, you should learn best practices for developing webpages. HTML & CSS on Codecademy is a great starting point.
Mastery Level 1:
- Create a 1 page website called index.html (the correct name for the starting page of a webpage)
- Correctly use the following tags
- html, head, title, body
- h1, p, img
Mastery Level 2:
- Add to your index.html as needed for the requirements below
- Create a second page that links to your index.html
- Correctly use an a (anchor) tag to link them
- Correctly use these other tags:
- a
- ul, ol, li
- header, footer
Mastery Level 3:
- Add to index.html and your second page as needed for the requirements below
- Create a third page that correctly links to your other pages
- Correctly use the following tags:
- table, th, tr, td
- main, nav
- Include a basic navigation menu linking to all pages
CSS Mastery:
CSS is all about making that boring old webpage look exciting. You can work on your CSS mastery along with HTML mastery to pump up the volume of your webpage. Remember we are looking for best practice, so your styling should be in its own file.
Mastery Level 1:
- Create a .css file as the stylesheet for your HTML page.
- Correctly link to your stylesheet in the head of your HTML page
- Use your stylesheet to do the following:
- change the background color of your page
- change the font color of some text
- change the size of some text
Mastery Level 2:
- Add to your stylesheet to further style both of your html pages to meet the requirements for level 2. Don’t forget to link your stylesheet on the second page!
- Use the following properties to style a part of your page:
- background-image
- max-width (keep your text readable by making sure it isn’t as wide as your whole screen)
Mastery Level 3:
- Add to your stylesheet to further style all three of your html pages. Don’t forget to link your stylesheet on the third page!
- Style the navigation menu
- Use the following properties to style a part of your page:
- margin AND padding
- At least one CSS variable (we suggest storing a color for reuse in your style sheet — One trick here Internet Explorer won’t work!)
Deploy your site to GitHub and use GitHub Pages for display using Cloud9!
JavaScript Mastery
JavaScript(JS) is a powerful way to add interaction and oomph to a webpage. You can add JS to your HTML/CSS project. To learn more about it, JavaScript on Codecademy is a great place to start. Walk through basic JavaScript functionality and console usage with a mentor.
To earn mastery badges for JS, use a combination of concepts from the “Concept of the Day” used each session.
- Mastery Level 1: incorporate 3 concepts
- Mastery Level 2: incorporate 6 concepts
- Mastery Level 3: incorporate 9 concepts
An idea that includes many concepts is to:
Create a simple calculator. Correctly use functions, variables, and control statement.
- Ask the user to enter two numbers and an operation (addition, subtraction, multiplication, or division).
- Perform the calculation.
- Display the result.
Deploy your site to GitHub and use GitHub Pages for display using Cloud9!
Portfolio
Get started with this worksheet!


